Connecting from FlashAir to Amazon AWS 2 (Execution)
Latest update: October 2018
In this tutorial we will explain how to send the data saved in FlashAir directly to AWS via the Internet. Please see here for preparation.
- AWS settings
- FlashAir settings
- About files to save
- Execution result
- Practical use
- Conclusion
- Sample code
AWS settings
Using the AWS account creation page, create a bucket and upload the image from FlashAir Let's run. Most of the settings in AWS are explained in detail on the official website, so this tutorial will be summarized briefly.
If you have already created an account and uploaded from another application in S3, please proceed to the FlashAir setting section.
Create an AWS account
Create an account from: creating an AWS account .
Create account by filling out your contact information, credit card information registration, account
authentication,
AWS support plan selection.
Please set up AWS
security authentication information
etc. as necessary.
Create a bucket in S3
Log in to Amazon S3 and select "Get started with Amazon S3". Proceed as instructed on the screen.
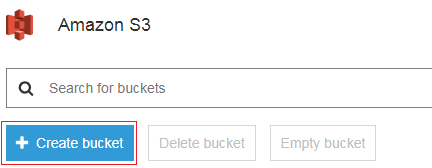
Click the "Create bucket" button.

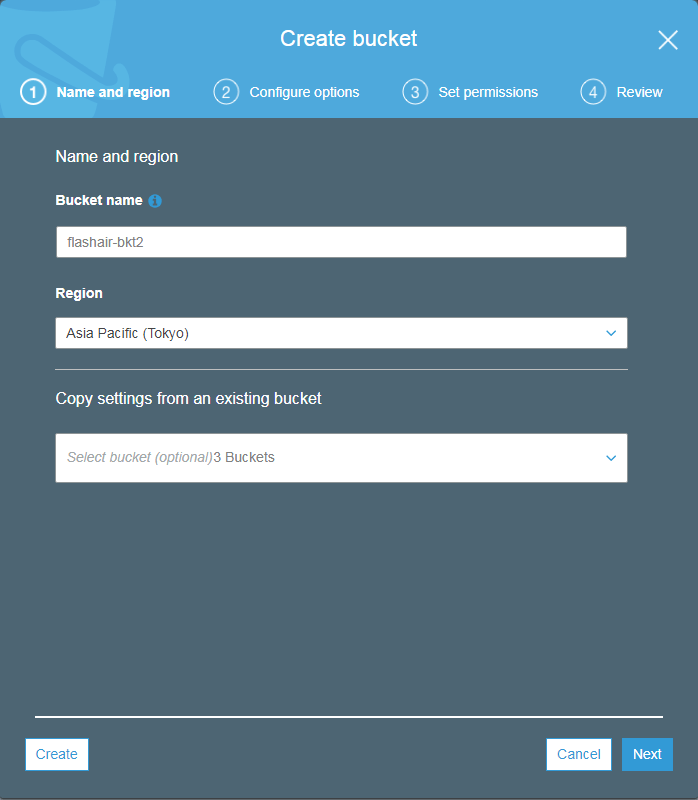
Create a bucket from the dialog. Enter an arbitrary bucket name and region, and click the "Next" button.
- Example
- flashair-bkt
- Asia Pacific (Tokyo)

Get the access key and secret key necessary for uploading the file to S3.
Click the account name from the
AWS menu bar and click "My Security Credentials".

Please refer to Managing Access Keys for IAM Users and obtain access key and secret key. Please be careful about handling this information and do not share it with others.
Now S3 is ready.
FlashAir settings
Set up FlashAir. Set FlashAir to station mode and use it as a wireless LAN slave. For details of station mode, please refer to the using Station Mode tutorial.
CONFIG setting
To edit CONFIG, open /SD_WLAN/CONFIG with an editor (any is fine) and edit the above parameters.
Since this
folder is a hidden folder, let's use a tool that can handle hidden folders.
(
/Volumes/(volume label name)/SD_WLAN/CONFIG for Mac)
You need to change the following three parameters in CONFIG. In parentheses are the corresponding parameter
names of
CONFIG.
If the parameter does not exist, add a new line. The order of parameters does not matter.
After editing, for example, it should look like this:
APPMODE=5
APPNAME=flashair
APPSSID=FOOSSID
APPNETWORKKEY=password0123
CIPATH=/DCIM/100__TSB/FA000001.JPG
VERSION=F15DBW3BW4.00.03
CID=02544d535730384708c00b7d7800d201
PRODUCT=FlashAir
VENDOR=TOSHIBA
MASTERCODE=18002d4ff0a2
LOCK=1
File installation and setting
Download the sample code at the bottom of the page and expand it in the root folder of FlashAir.
Open s3-put.lua with a text editor.
The 3-6th line should be overwritten with the correct region, bucket name at the time of bucket creation, access
key acquired
by creating a bucket in S3, secret key.
s3-put.lua
local s3Util = require("s3-util")

local REGION = "ap-northeast-1"					--Region name
local ACCESS_KEY = "AKIAIXXXXXXXXXXXXXXX"			--Access key
local SECRET_KEY = "/id3EXXXXXXXXXXXXXXXXXXXXXXXXXXXXXXXXXX+"	--Secret key
local BACKET = "flashair-bkt"					--Bucket name
About Saving Files
- DATA folder
The folder in which to store the file to upload. - s3-exec.lua
If a file created after the date saved in thesendtime.datfile is found in the DATA folder, it will pass the file path and file name to the S3Put class of thes3-put.luafile . It checks in the folder every 10 seconds. - s3-put.lua
Upload the file to S3 bucket. - s3-util.lua
A utility class. Calculate and acquire current time, hash value, etc. - sendtime.dat
Save the current date after searching the file withs3-exec.lua.
Caution If the file is not uploaded, enter1in the file (initialize the file search date and time), overwrite the file, save the file again in the DATA folder, and copy it.
Let's see how the sample program works.
s3-exec.lua
local s3Put = require("s3-put")

local dir = "/DATA"- Line 3
Include s3-put.lua. - Line 5
Specify the storage folder of the file to be uploaded. To change, please modify"/DATA"to an arbitrary location.
function readSendTime()
    local sendtime = 0
    local file = io.open(timefile, "r")
    if file ~= nil then
        sendtime = file:read()
        file.close()
    else
	debug("file == nil")
    end
    if sendtime == nil then
	debug("sendtime == nil")
        sendtime = 0
    end
    debug("r = " .. sendtime)
    return sendtime
end
Read contents of sendtime.dat file and return contents.
function writeSendTime(sendtime)
    local file = io.open(timefile, "w+")
    if file ~= nil then
        file:write(sendtime)
        file:close()
        debug("w = " .. sendtime)
    end
end
Write the date and time of file search in the sendtime.dat file.
function getFilePath(sendtime)
	local filepath, filename = nil
	local result, filelist, sendtime = fa.search("file", dir, sendtime)
	if result == 1 or filelist ~= nil then
		filepath = string.match(filelist, "(.-),")
		if filepath ~= nil then
			filename = string.match(filepath, "[^/]*$")
		end
	end
	return filepath, filename, sendtime
end
In fa.search, retrieve and return the oldest file (the newest file after the specified date and time) of the file whose sendtime and update date matches the argument sendtime or argument sendtime.
function execute()
    local temptime = readSendTime()
    if temptime == 0 then
        print("temptime == 0")
        return
    end
    local sendtime = tonumber(readSendTime()) + 1
    local filepath, filename, time = getFilePath(sendtime)
    if filepath == nil then
        return
    end
    writeSendTime(time)
    debug("filepath = " .. filepath .. ", filename = " .. filename)
    local s3 = s3Put:new(filepath, filename)
    s3:put()
end- Line 47
Read the sendtime.dat file. If the date and time can not be acquired, it ends. - Lines 52-53
Searches for files after 0.5 seconds of the date and time stored in sendtime.dat. - Line 57
If the corresponding file is found, write update date of the file in sendtime.dat. - Line 59
Pass the file path and file name to the S3Put class.
function debug(msg)
	--print(msg)
end
Display debug messages. Please delete the comment if necessary.
while(1) do
	execute()
	sleep(10000)
	collectgarbage("collect")
end
Use sleep to search files every 10 seconds.
s3-put.lua
local s3Util = require("s3-util")Include s3-util.lua.
local S3Put = {}

S3Put.new = function(self, fpath, fname)
	local this = {}

	local SERVICE = "s3"
	local METHOD = "PUT"
	local PAYLOAD_HASH = "UNSIGNED-PAYLOAD"
	local ALGORITHM = "AWS4-HMAC-SHA256"
	local CONTENT_TYPE = "image/jpeg"

	local util = s3Util:new()

	local filepath = fpath
	local filename = fname
	local nowtime = util:currentTime()
	local date = os.date('!%Y%m%d', nowtime)
	local datetime = os.date('!%Y%m%dT%H%M00Z', nowtime)

	local dataPath = "/" .. filename
	local host = SERVICE .. "-" .. REGION .. ".amazonaws.com"
	local canonicalURI = "/" .. BACKET .. dataPath
	local endpoint = "https://" .. host
	local canonicalQuery = ""
	local signedHeader = "content-type;host;x-amz-content-sha256;x-amz-date"
	local credentialScope = date .. "/" .. REGION .. "/" .. SERVICE .. "/" .. "aws4_request"

	function this:getSignatureKey()
		local kDate = util:sha256Hmac("AWS4" .. SECRET_KEY, date)
		debug("kDate=" .. kDate)
		kDate = util:hex2Bytes(kDate)
		local kRegion = util:sha256Hmac(kDate, REGION)
		debug("kRegion=" .. kRegion)
		kRegion = util:hex2Bytes(kRegion)
		local kService = util:sha256Hmac(kRegion, SERVICE)
		debug("kService=" .. kService)
		kService = util:hex2Bytes(kService)
		local kSigning = util:sha256Hmac(kService, "aws4_request")
		debug("kSigning=" .. kSigning)
		kSigning = util:hex2Bytes(kSigning)
		return kSigning
	end

	function this:getStringToSign()
		local canonicalHeader = "content-type:" .. CONTENT_TYPE .. "\n" .. "host:" .. host .. "\n" .. "x-amz-content-sha256:" .. PAYLOAD_HASH .. "\n" .. "x-amz-date:" .. datetime .. "\n"
		local canonicalRequest = METHOD .. "\n" .. canonicalURI .. "\n" .. canonicalQuery .. "\n" .. canonicalHeader .. "\n" .. signedHeader .. "\n" .. PAYLOAD_HASH
		debug("canonicalRequest=" .. canonicalRequest)
		local stringToSign = ALGORITHM .. "\n" .. datetime .. "\n" .. credentialScope .. "\n" .. util:sha256(canonicalRequest)
		debug("----stringToSign----")
		debug(stringToSign)
		debug("----------")
		return stringToSign
	end

	function this:getAuthorizationHeader()
		local signingKey = this:getSignatureKey()
		local signingSign = this:getStringToSign()
		local signature = util:sha256Hmac(signingKey, signingSign)
		local authorizationHeader = ALGORITHM .. " " .. "Credential=" .. ACCESS_KEY .. "/" .. credentialScope .. ", " .. "SignedHeaders=" .. signedHeader .. ", " .. "Signature=" .. signature
		debug("----authorizationHeader----")
		debug(authorizationHeader)
		debug("----------")
		return authorizationHeader
	end

	function this:put()
		local filesize = lfs.attributes(filepath, "size")
		local headers = {["content-type"]=CONTENT_TYPE, ["content-length"]=filesize, ["x-amz-date"]=datetime, ["x-amz-content-sha256"]=PAYLOAD_HASH, ["Authorization"]=this:getAuthorizationHeader()}
		local requestURL = endpoint .. canonicalURI
		local body, code, header = fa.request{
			url=requestURL,
			method="PUT",
			headers=headers,
			file=filepath,
			body='<!--WLANSDFILE-->',
			bufsize=1460*10,
		}

		debug("resultCode=" .. code)
		debug("headers=" ..  cjson.encode(header))
		debug("body=" .. body)
	end
	return this
end
Define the S3 Put class.
- Lines 35-49
Create a key to encrypt the signature from secret key, region etc. For details of the signature key, please click here . - Lines 51-60
Create a canonical request. For details of regular request, please click here . - Lines 62-71
Create a signature string of Signature Version 4 with a signature key and canonical request and create a canonical header. - Lines 73-89
Send the request to the AWS API using fa.request.
Execution result
After setting up FlashAir, plug in FlashAir and reflect the fix.
When the OS on the host side of the SD memory card such as a PC caches the contents of the SD memory card, the OS can not recognize the change. Therefore, if you change simultaneously from SD memory card host equipment and Lua or CGI, FAT inconsistency may occur.
Execute http://flashair/s3-exec.lua from the browser.
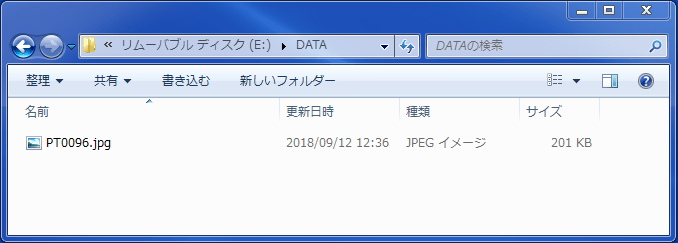
Create or copy a file in the DATA folder.

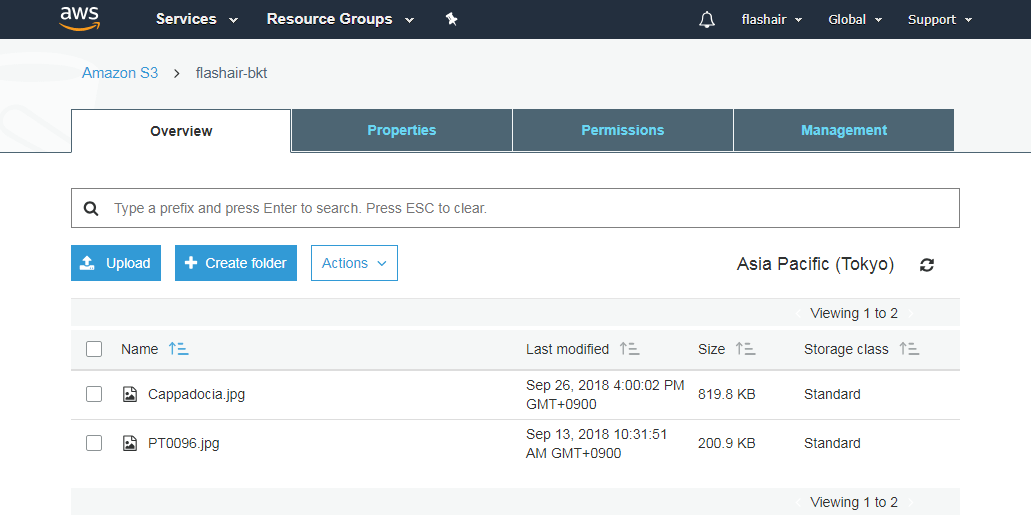
Confirm that the upload was done.
Click the bucket name created in "Creating bucket in S3".
It was confirmed that the file in the DATA folder was uploaded.

Practical use
By using Lambda, Rekognition and QuickSight described in the Preparation section, you can process, visualize, and share acquired data.
I used Rekognition to analyze and find the subject's age, gender, existence of smile etc. from a face picture photographed with a moving body detection camera, and visualized with QuickSight.
When a file is added to S3 in Lambda, create a function to call Rekognition 's face recognition processing.
For how to create a function, see Create a Lambda Function .
Prepare a bucket to store the analysis result in S3 beforehand. After acquiring Rekognition's analysis
processing, prepare a function to store the analysis result in analysis bucket in S3.
In QuickSight, you can create graphs using the data of the analysis bucket created above. For instructions on using QuickSight, see What Is Amazon QuickSight? .
Conclusion
Although I explained how to connect directly to AWS from a Lua script on a FlashAir device twice, it is also possible for AWS's side to perform various computing processes difficult with simply using a FlashAir alone.
If you are already using a device with an SD card slot, you can quickly build an IoT system as long as you have a WiFi environment.
- FlashAir IoT Hub
- If compute processing is unnecessary, FlashAir IoT Hub is useful when only accumulating data, or if you want to link with SNS or other web service. You can perform visualization of the cloud management of photos and measured values and IFTTT linking with just a simple setting. Please see here for the detail.
Sample code
advanced_tutorial_08.zip (4KB)
All sample code on this page is licensed under BSD 2-Clause License
 FlashAir™ Developers

